How to render a texture with a Diffuse map + Normal map to render the largest and most realistic details that give the texture its true face. It is important that you have photoshop or gimp with a plugin for rendering the height map.
First create a texture, for example a road, create it in 1024×1024 size in .TGA format (least compressed)
Now we will generate a Normal map of this texture using the NVIDIA Tools plugin:
Save this in the same size 1024×1024 in .BMP
Now the actual work in 3ds max:
Create a PLANE in the new project, let’s say it is 7.5 m wide and 6 m long, in the Material editor set Standard and maps set your diffuse map (Diffuse color) + normal map (Bump) > Normal Map > Map enter your normal map.
In the edit mesh, texture this plate…
Now click on the keyboard “0”
A window will appear in which it is important to set a few parameters
- In options: check “Ray miss check” and in Normal Map Space setting check “UP”
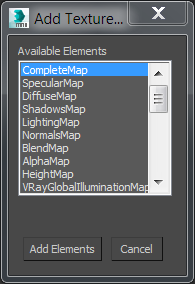
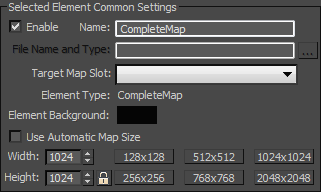
- Output: Diffusion Map size 1024×1024 ; Normals Map size 1024×1024 you add it “Add…”
- At the bottom of the settings, enter Render with a dot and Render
To export map normals, there is a guide under: Realistic model using textures
Now it will ask you to overwrite textures, allow it and now it will start rendering your textures (this operation may take some time depending on how the image rendering is set!)
How to do it?
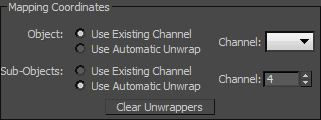
There are two possible ways to render textures from a model you have created. One is if we have an Unwrap mapped project and properly saved, the Use Existing Channel function can be used thanks to the map network setting in Mapping Coordinates, this will read from your settings that you created beforehand, if we do not have the Unwrap object mapped by mapping, the automatic mapping function will create a network , which will overwrite the previous settings.

In order to render the texture, it is necessary to have the Projection Mapping – Enabled function enabled

In Output – We choose the output we want the texture to be created for us, by clicking add a selection of several options will be displayed, for our needs we will use ComplatMap (it is a set of several textures at once “Diffusion map, NormalMap, SpecularMap), each of the textures can be named differently . The size of the textures is important, the setting offers us multiples of two 128×128; 256×256; 512×512; 1024×1024; 2048×2048

To render shadows, it is good to leave the Shadows function on, but this setting works well if we have sunlight or lighting set on the object, if we also have lights, we will be asked to render lighting effects.


