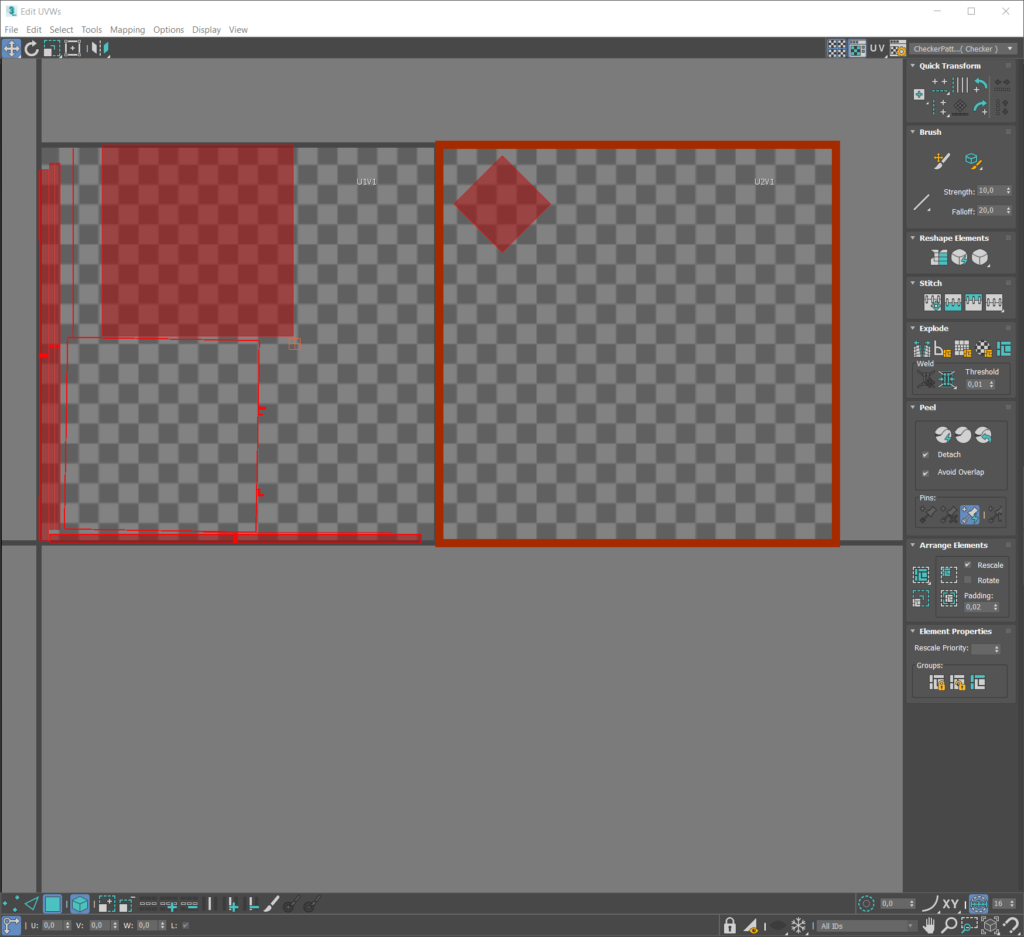
The basis of any good work is the mapping of the mesh object in UVWs editing, this example is from the 3ds Max environment, we will create a basic and simple model to begin with, here I have a brand model. Next, we will create two basic materials, they must not be V-Ray or other extensions. In Edit Mesh, we apply material A to the back, material B to the front.

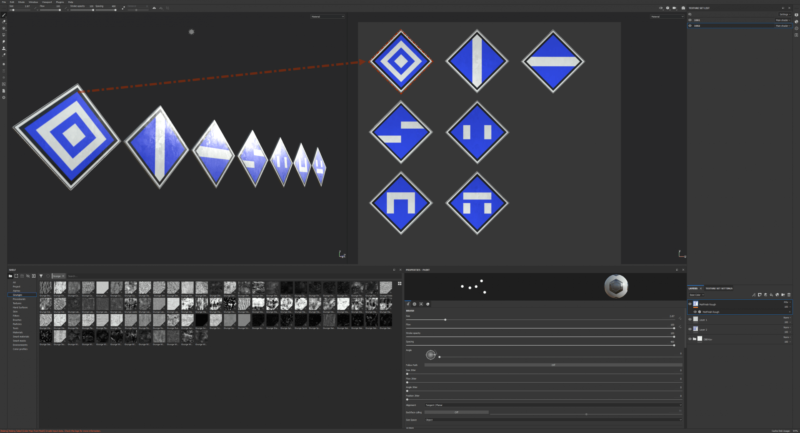
We will create an Unwrap UVW and start editing, if we have some experience with mapping they will of course come in handy, the top bar in the UVWs editing offers the very first icon in the right corner Show the multi-tile in the dialog (Show the multi-tile in the dialog). If we activate this icon, we can drag the mesh material into the column as desired. In this case, I will keep material A in U1V1 and material B in U2V1. If you make several traffic signs of the same type and dimensions, for example, it is useful to create a template (1024x1024px depending on the size of the working environment). Since I will be making seven markups, material A will be the same for all of them and I will modify material B by making copies of the mesh files Shift+drag (make only a copy). We will open the dialog again and for U2V1 we will move the mapping to the next texture that we want to map – This is how we will proceed with other mesh copies.

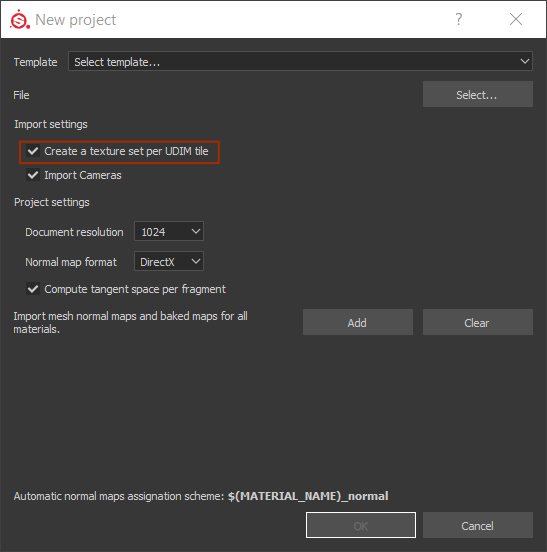
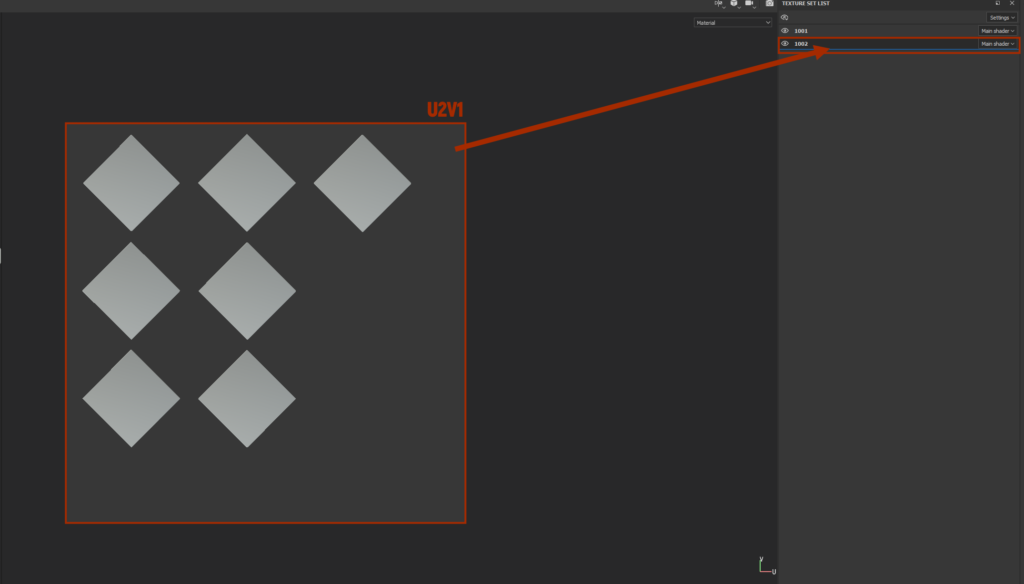
We export the entire file in FBX 2018 (or another) format and start Substance Painter. We create a new project in Painter and in the Import settings we must specify that we will use Create a Texture set per UDIM tile. We will create a Texture Set List in the right column of the project with two files (1001 and 1002), the two files are separately separated and can now be rendered and worked with in turn.


