Here is a description of how to export work to TRS2019 for version 4.6 and higher. First a few sentences to clarify, version 3.7+ requires the included files for the game to have a LOD system, ie files that contain the descending number of included polygons in the object. LOD0 = 100%; LOD1 = max 500 polygons and gradually decrease like this. Otherwise you will get an error message:

mesh("0.15")
   {
       name="body_lod4.trainzmesh";
   }
   mesh("0.4")
   {
       name="body_lod3.trainzmesh";
   }
   mesh("0.95")
   {
       name="body_lod2.trainzmesh";
   }
   mesh("1.0")
   {
       name="body.trainzmesh";
   }
Mapping
The basis of all success is to have the project correctly mapped and then covered with texture, there are many programs to achieve this, in another article there is a description of, for example, an sbs file, i.e. a file created in Substance Painter, the latest version already works better with the table and the created project can be exported in fbx file, thus beneficial for our project.
If we have an open project back in 3ds max “M” to open the material and start texturing, the “dropper” will be suitable for us to automatically create all the materials that are used on the object. We will be interested in Diffuse color, Glossines and Bump, we will individually connect the texture with the material, only for Bump we need to use one more conversion, namely Normal Bump, which will convert the correct normal texture to bump. The entire connection is shown here.
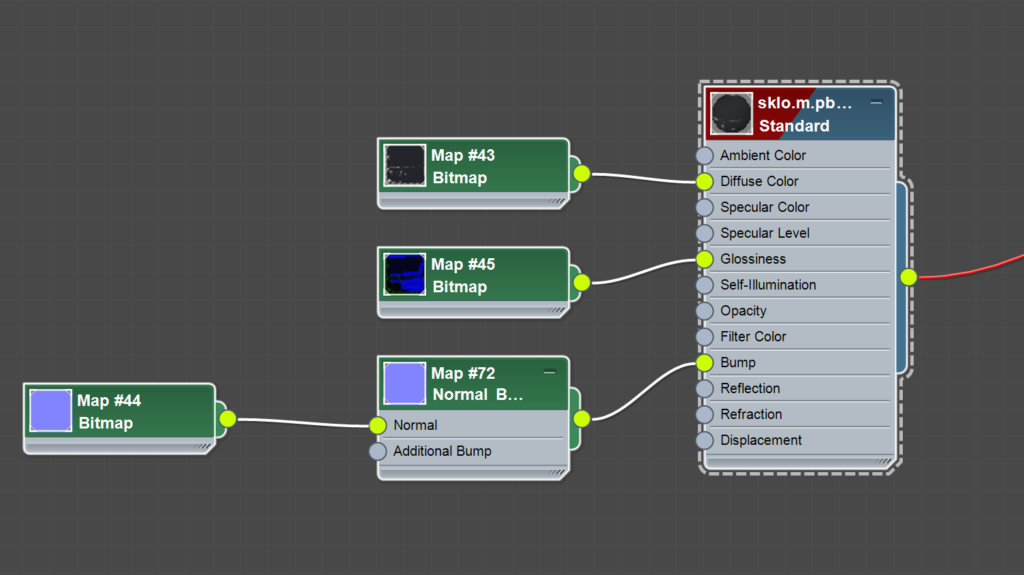
Naming There are several options to set the correct function of materials, but for this project, which uses a parameter map using PBR textures (R+G+B+A) naming:
.m.pbrmetal
the game in this case knows that it is a PBR material, using a reflective component. Indeed, PBR works for both Specular and Metallic interfaces of materials.
The material interface setup is shown here:
.m.pbrmetal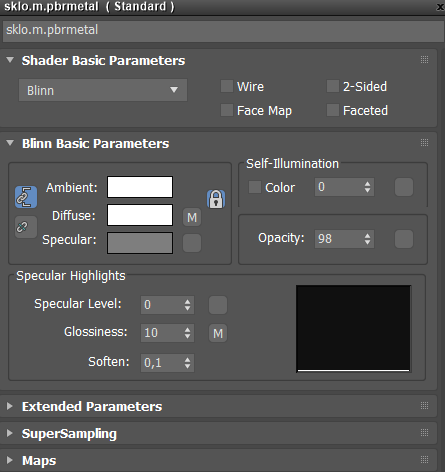
We will create this procedure for all materials.
LOD System
Since we are making a file for version 4.6, we have to create a LOD so that the model does not load too much on the CPU, it is achieved by first creating the first model, which we name stations and therefore for model export, LOD0 will be copied from our primary model, in this case I will only one copy, this copy will appear under the name station_lod_1 and for export LOD1
There is a ProOptimizer function in 3ds max, before we start optimizing the file, enable texture preservation. Next, let the model be analyzed and then reduce the percentage of polygons contained in the model. In this case, the game wants us not to exceed 500 polygons at LOD1!
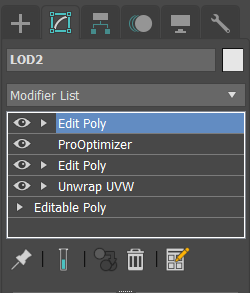
Here is a sample comparing the primary model with LOD1:

After optimization:

The table including polygons reduces from the original 164681 to 452. For this test, a function directly in the Map Channel Info tools is good.

Export and set config and textures
I will individually export the files in .fbx format to a folder that we will determine, the settings in this case will look like this:
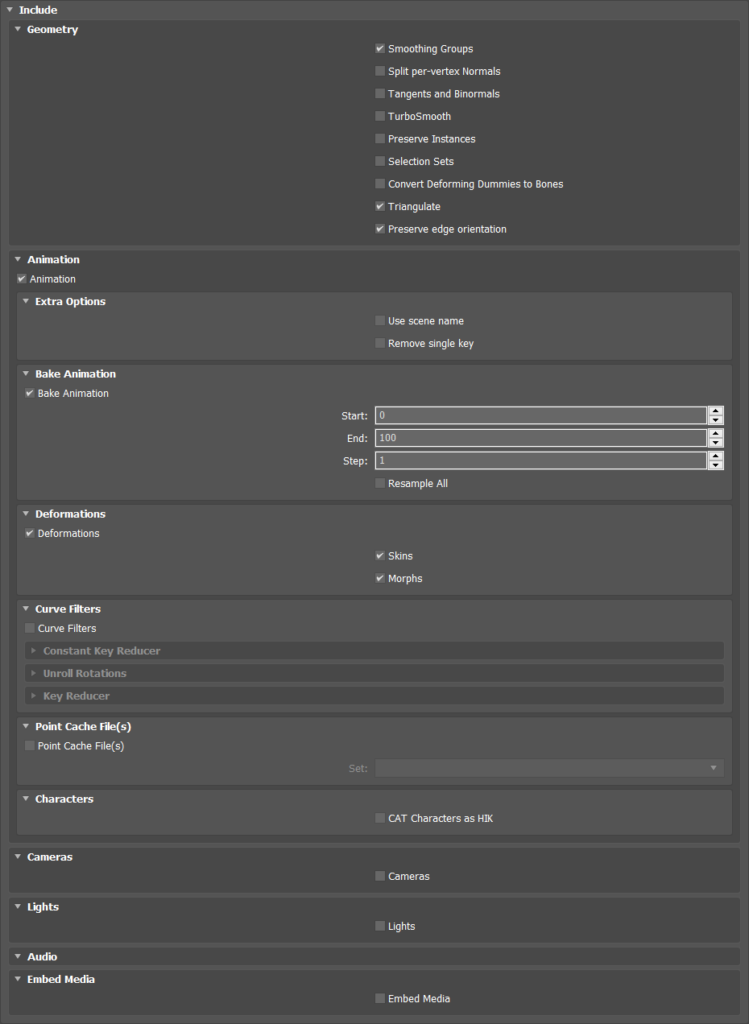
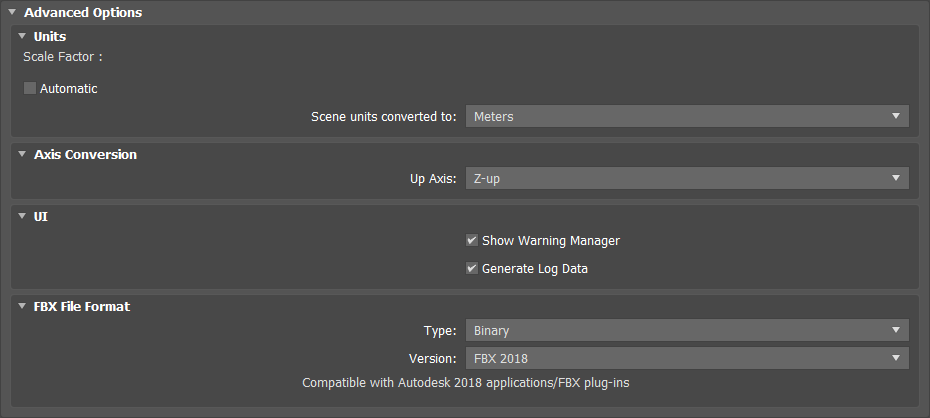
In the folder we will create two files LOD0 and LOD1, both files do not mean anything yet, because in order to achieve the function, it is necessary to write the configuration file config.txt and it will look like this:
username                                "Station"
trainz-build                            4.6
category-class                          "BC"
kind                                    "scenery"
author                                  "Autor"
contact-email                           "autor @"
contact-website                         "www"
organisation                            "Org"
license                                 "©2020 By autor"
description                             "Station"
category-era                            "1940s;1950s;1960s;1970s;1980s;1990s;2000s;2010s"
category-region                         "AT;CH;FR;SI;DE;IT,CZ,SK"
category-keyword                        "Building, Industry"
mesh-detail-level-count                 2
mesh-table-lod-transition-distances     500

mesh-table
{
  default-lod0
  {
    mesh                                "lod0.trainzmesh"
    auto-create                         1
    lod-level                           0
  }

  default-lod1
  {
    mesh                                "lod1.trainzmesh"
    auto-create                         1
    lod-level                           1
  }
}

kuid-table
{
}

thumbnails
{
  1
  {
    width                               240
    height                              180
    image                               "thumbnail_1.jpg"
  }
}
kuid                                    <kuid:383363:111111>
In the mesh command is required for the name lod0 and lod1
.trainzmesh
the one with our exported fbx file will automatically generate the file lod0 and lod1.trainzmesh after saving the project
But before that, it is necessary to insert all the included textures into the project folder and create the corresponding .txt files
Albedo map
Primary=Albedo.tga
Alpha=Albedo.tga
Tile=st
Pro Normal mapu:
Normal map
Primary=Normal.tga
Alpha=Normal.tga
Tile=st
NormalMapHint=normalmap
ModifyMap=flipgreen
Parameters map
Primary=Parameters.tga
Alpha=Parameters.tga
Tile=st
When we have all the textures named by setting for example: Albedo.texture ; Normal.texture and Paremeters.texture and correctly written configuration file and created mini image, we can Insert Edit Ctrl+Shift+E
If Content Manager doesn’t give us an error, everything is fine.
Sometimes it happens that when you put a file in cdp you get a texture load error, then try opening the works again and then put it in again, if the error doesn’t show, everything is fine.
After reopening, two new files named .trainzmesh were created


